
You can move part of a shot image like a movie.
Shooting
-
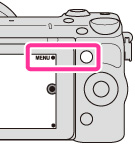
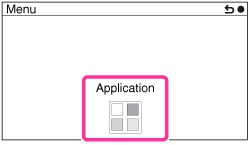
Select MENU → [Application] → [Cinematic Photo].
-
Select the shooting icon.
-
Press the shutter button to start taking pictures serially.
When you hold down the shutter button, shooting stops automatically when the serial shooting upper limit is reached.
Shooting also stops when you release the shutter button.
-
Use the control wheel to select the part of the shot still photograph to be moved, and select NEXT to enter the selection.
When using a camera model with a touch panel, you can also set the part to move by dragging on the touch panel with your finger.
- To deactivate the image stabilization function for combining serial images, turn the control wheel until the
 (Image Stabilization OFF) icon is displayed on the screen, then select it. We recommend that you select (Image Stabilization OFF) mode when the serial images were taken using a tripod. To activate the image stabilization function again, select
  (Image Stabilization ON).
- To deactivate the image stabilization function for combining serial images, turn the control wheel until the
-
Select SAVE to save the edited image.
The movie file is saved in the dedicated application directory.
When using a Memory Stick: The file is saved in the directory below /MSSONY/CAM_APPS/APP_CNPH/
When using a SD card: The file is saved in the directory below /PRIVATE/SONY/APP_CNPH/
-
To end [Cinematic Photo], select EXIT on the shooting information screen.
When [Cinematic Photo] ends, the settings return to the original settings.
-
To copy movie files created using this application to a computer, insert the memory card which contains the movie files into the computer.
Or, you can copy the movie files using the USB cable as follows:
Windows: Connect the camera and the computer via the USB cable, and use “PlayMemories Home” version 2.0 or later.
Mac: Connect the camera and the computer via the USB cable, and set MENU → [Setup] → [USB Connection] → [Auto] or [Mass Storage]. Then use “iMovie” or other software.
Notes
- When you use [Cinematic Photo], some camera functions are limited.
- Only the composite image will be recorded. The serially shot images are not recorded.
- When the power is turned off or some other error occurs partway through shooting, the images before composition may remain.
- Movie files created using this application cannot be transferred to a computer or a Smartphone, etc. by Wi-Fi connection.
- When using the USB cable, if you do not follow the procedure above, you may not be able to copy the movie files to the computer. In such cases, set MENU → [Setup] → [USB Connection] → [Mass Storage].
Viewing
-
Select MENU → [Application] → [Cinematic Photo].
-
Select the viewing icon.
-
Select the image.
-
To select a different image, select the “Back” icon to return to the playback list, then reselect the image.
-
To end [Cinematic Photo], select the “Back” icon repeatedly until the TOP screen appears, then select EXIT.
Notes
- The recorded contents can be played back on the camera only in the “Cinematic Photo” application. In addition, images are played back using only simple playback which has a lower playback rate.
- When playing back recorded contents on a computer, playback may not be smooth depending on the computer environment.
- When the image database file is deleted, image playback may not be possible in the “Cinematic Photo” application.
Uploading the created image to your network service
You can upload the created image directly from the camera to your network service. First download [Direct Upload] from the PlayMemories Camera Apps download site.
-
Install Ver. 1.20 or later of [Direct Upload].
- Confirm the [Direct Upload] version, from MENU → [Application] → [Application Management] → [Manage and Remove].
-
Follow steps 1 to 4 under “Viewing” above, and select the image you want to upload.
-
Select MENU → [Upload] → OK.
- [Direct Upload] launches.
- If [Direct Upload] has not been installed, the
 (Delete) icon is displayed at the MENU position.
-
Follow the instructions on the screen to upload the image to your network service.