
You can upload images to network services directly from the camera using Wi-Fi.
-
Select MENU → [Application] → [Direct Upload].
-
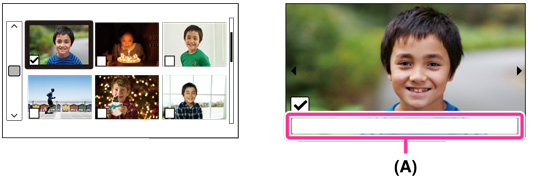
Select the image you want to upload and press [Next].
- The single image screen is displayed when you select an image.
- You can deselect the image on the single image screen.
- To add comments to the image, select (A) on the single image display to display the software keyboard.
- When uploading multiple images in succession, press
 on the single image display and select other from the image index.
 - Images created by some applications may not be displayed on the image selection screen. If that happens, launch the application you used to create that image, and use the upload function of that application.
-
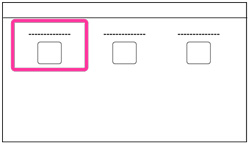
Select the upload destination for the images.
- To set the Wi-Fi access point, image size and account information for the network service, press [Settings].
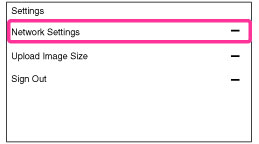
Network Settings Sets the access point. Upload Image Size Selects the image size for images to be uploaded. Sign Out Signs out from the service that you are signed in on. -
Log into the network service.
-
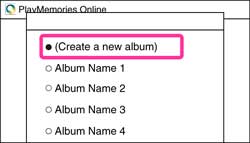
Display the album list, and select an album to upload.
- To edit the name of an album, select [(Create a new album)] on the album list screen. The software keyboard appears.
- Here a shot of the screen for “PlayMemories Online” is used to explain.
-
Upload images by pressing [Upload].
- You can remove images from the upload list by pressing
 .
.
- You can remove images from the upload list by pressing
-
When the upload is complete, a “completed” message will be displayed.
- If you press [OK], you can select more images and upload them to the same destination.
- If you press [Sign Out], you will be logged out of any services you are logged into.
-
To end [Direct Upload], press [Exit App.].
 Add upload sites
You can add additional network services as selectable upload destination. Install the desired application for network services from the “PlayMemories Camera Apps” website in advance.
Notes
- You will need to create accounts for each network service on the website beforehand.
- Depending on the network services, the screen display and function will vary.
- You will need to input the account name and password as login information for the network services you have acquired.
- “PlayMemories Online” may not be compatible depending on the region.
- Depending on the region, the network service to which you want to upload images may not be supported.
- You cannot edit the name of existing albums.
- All illustrations in this guide are representative images.
Names of Software keyboard parts

| A | Input box | The characters you entered are displayed. |
| B | Keyboard | Select a character you want to enter. |
| C | Switches the next character to a capital or small letter. | |
| D | Switches keyboards. | |
| E | Switch character types | Switches Alphabets/figures/symbols. |
| F | Move cursor. | |
| G | Starts a new paragraph. | |
| H | Delete | Deletes the character preceding the cursor. |
| I | Done | Exits/Quits keyboard. |
How to input languages other than English
- First install the desired keyboard application on your camera. You can input languages other than English using that application.
Notes
- The language displayed on this application is the same as the language in the camera’s setting. However, you may not be able to select some languages used in this guide, depending on the model.
Copyright 2012 Sony Corporation